Trik Mantap Seo | Tambahkan Meta Tag di Blog Anda


Mudah-mudahan di artikel ini kita berjumpa dalam keadaan yang berbahagia dan penuh semangat. Sebelumnya, kami mohon maaf karena cukup lama hiatus (tidak nge-blog dalam kurun waktu tertentu) dikarenakan ada agenda yang cukup penting, sehingga blog ini tidak diupdate selama satu minggu.

Oke… hmm.. mau mulai dari mana ya? Gimana kalau trik SEO aja yah? Mudah-mudahan sobat JC suka dan menikmati artikel ini. 

Membahas soal SEO memang tidak pernah ada habisnya. Ada banyak hal menarik yang bisa kita pelajari dalam SEO, baik itu SEO on page maupun SEO of page. Nah ngomongin soal SEO, kali ini kami punya trik SEO yang perlu dilakukan pada blog kita masing-masing. Apa triknya? Triknya adalah menambahkan meta tag pada blog Blogger yang kita miliki. 


Apa sih meta tag itu? Meta tag adalah salah satu elemen dalam bahasa pemrograman HTML/XHTML (bahasa yang biasanya ada pada kode blog) yang fungsinya sebagai metadata dalam suatu halaman website.
Sehingga meta tag itu dapat digunakan untuk menjelaskan deskripsi suatu halaman website supaya bisa diindex oleh mesin pencari, seperti Google


Karena meta tag cukup diperlukan, jadi mari kita pasang pada blog kita masing-masing.
Bagaimana caranya...?? Silahkan ikuti langkah-langkah berikut ini :
Karena tanpa ini Mbah Google tidak dapat detek website kita.. apalagi kita ini pemula didunia Website.

   1. Silahkan login ke akun Blogger dan masuk ke Dasbor Blog kita
   2. Selanjutnya klik Menu Template


    3. Berikutnya silahkan klik tombol Edit HTML.


   4. Berikutnya klik tombol lanjutkan untuk masuk ke editor template kita.
   5. Setelah masuk ke editor tamplate, silahkan tekan tombol Ctrl + F lalu cari kode <head>.
   6. Setelah kode <head> ditemukan, silahkan teman-teman tambahkan kode berikut tepat dibawah kode   
       <head>.
7. Ganti dulu tulisan "deskripsi blog sobat" dengan deskripsi dari blog sobat,


  • Berikutnya klik tombol Lanjutkan untuk masuk ke editor template sobat.
  • Nah setelah masuk ke editor template, silakan tekan tombol Ctrl + F lalu cari kode <head>.
  • Setelah kode <head> ditemukan, silakan sobat tambahkan kode berikut tepat di bawah kode <head>.
  • Ganti dulu tulisan “deskripsi blog sobat” dengan deskripsi dari blog sobat, kalimat “kata kunci blog sobat” ganti dengan kata kunci blog sobat.
<meta content=' deskripsi blog sobat' name='Description'/>
<meta content=' kata kunci blog sobat' name='Keywords'/>


  • Nah setelah ditambahkan, silakan simpan pengaturan dengan klik tombol Simpan Template.


Nah itu dia trikya. Sebagai bukti bahwa proses penambahan meta tag berhasil, maka silakan sobat buka salah satu artikel di blognya lalu kirimkan ke Facebook. Maka nanti akan ditemukan deskripsi blog sobat pada kiriman artikel tersebut.


Oke sobat yang baik hatinya, itulah trik SEO mantap kali ini. Mudah-mudahan bisa membantu optimasi SEO dari sobat JC. Saya doakan semoga blog sobat bisa masuk halaman depan hasil pencarian Google.

Ini semua juga Info dari para Bloger yang lebih senior...
Sumber : Jefferly Helianthusonfri

Eset Smart Security 5 and Eset NOD32 Antivirus 5 incl keygen-32 and 64 bit


Yang satu lagi dari Esedt NOD32 Versi 5 32 dan 64 bit incl key setelah saya coba ternyata ok juga berjalan normal. Dan juga bisa scan flashdisk bila flashdisk kita colokan ke USB langsung detek. 


Description Installation instructions: Option 1 (You have not yet installed your ESET product): 
  1. Run ESET PureFix and click enable. 
  2. Install your ESET product. 
  3. Activate the 30 day trial(using any made up email address). 
  4. If ESET doesn't start updating after activation, then force a manual update. 
  5. Wait for PureFix to finish. 
  6. Optionally - Reboot. 


Option 2 (You have already installed your ESET product and activated the Trial License): 
  1. Restart your computer in 'Safe Mode' either by clicking the 'Reboot in Safe Mode' button or following the   intructions here - http://www.pchell.com/support/safemode.shtml 
  2. Run ESET PureFix and click enable. 
  3. Reboot. Removal instructions: 


Option 1 (You are removing your ESET product completely): 
  1. Run ESET PureFix and click disable. 
  2. Uninstall your ESET product. 
Option 2 (You only want to remove PureFix): 
  1. Restart your computer in 'Safe Mode' (you can use the safe mode option in the extras tab, or follow intructions here - http://www.pchell.com/support/safemode.shtml) 
  2. Run ESET PureFix and click disable. 
  3. Reboot. 


Untuk download kita harus menggunakan Torrent, bagi teman-teman yang belum menggunakan Torrent bisa download disini TORRENT

Download Eset NOD32 V.5

Selamat mencoba sukses selalu

RocketDock 1.3.5 Full + Addons

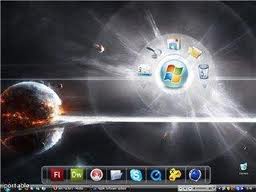
RocketDock 1.3.5 Full + Addons | Rocket dock is a software to beautify the look of your windows desktop.
RocketDock has several advantages that can always be raised, or even in the Auto-hide so that when he is touched by the new mouse will move.

RocketDock is a simple but very useful application for those who want to make the desktop look more beautiful. Rocket dock is the function to put a shortcut on the Shortcut tampilang the cooler have been provided by RocketDock itself on setting the menu provided.


RocketDock is a smoothly animated, alpha-blended application launcher That is similar to ObjectDock. RocketDock renders very fast like MobyDock, has Y'z Dock's visual sharpness and the stability That Neither seem to possess.

RocketDock is compatible with every dock skin format we are aware of.

Mac OS X Remains an eye-candy operating system, even if we all agree That Windows 7 is much more appealing as compared to the previousWindows iterations.


That's why many users are still using a Mac OS X-inspired dock on TheirWindows workstations, and RocketDock is one of the most popular picks.

The application has been specifically developed to add a launcher dock to your desktop, either being Able to work together with the WindowsTaskbar or replace it completely. It's all up to the user, but after our test, we'd rather say That it's not yet possible to replace the Taskbar altogether.


RocketDock position is fully configurable from the settings menu, so you can place it virtually anywhere on your screen. Plus, there are dedicated tools to set it always on top or always on bottom, as well as separate options to make it work on multiple monitors.

But what's more Important is the behavior per se. RocketDock works just like a genuine Mac OS X dock, with multiple zooming effects once the user moves the mouse cursor over an icon, called Bubble, Plateau and Flat.


Of course, the zoom effect can be fully changed by the user, as the app comes with options regarding the zoom width and duration.
The way it looks is again one of the Things the user can change from the get-go Because RocketDock supports themes and beside the ones That are already included in the package, you can also download more from the Internet.


It does not slow down the computer too much, but in case the app Hampers performance on older machines, there's a dedicated option to Reduced icon Thus Spake improv quality and speed as much as possible.

There's no doubt RocketDock is one of the best apps of its kind and since it comes with so many goodies, it would be a shame to not give it at least a chance.


Key Feature:

· Runs great on slower computers
· Compatible with Y'z Dock, Mobydock, and ObjectDock skins
· Unicode compliant
· Simple drag-n-drop interface
· True multi-monitor support
· Supports alpha-blended PNG icons
· Fully customizable


Requirements:

· 500Mhz or faster CPU
· 10MB RAM free


What's New in This Release:

· Fixed an INI bug breaking Skin / Theme compatibility.


60 Over Theme Collection For Windows 7

60 Over Theme Collection For Windows 7 | Maybe some of you already have this, what if I tp share for those who do not have. In accordance with the post title, this time I will share Thema collection for Windows 7, if you ask me this is not a common theme, this is a cool set of themes that you should try to beautify the look of windows 7 you, and here there is not just one or two themes but there is more of the 60 themes in one package, you just need to make the installation 1xinstall the whole theme of windows 7. For those who want to directly check this out.


Windows 7 ships by default with its own collection of themes and wallpapers, but there are additional downloads available from the WindowsPersonalization Gallery.


Depending on Their country of residence, some customers receivedWindows 7 themes tailored specifically to Their market.


According to the Redmond company, there are approximately 60 international theme packs for Windows 7, some of the which included with the operating system, and accessible as soon as Becoming the users is done installing the OS in a Certain language.


Jennifer Shepherd, site manager for the Windows Personalization Gallery That explains she used Microsoft's worldwide resources to put together the themes.


"When I was working on Windows 7 themes for specific places, Such as India, Brazil, Italy, and Korea, I relied on co-workers in each country to advise me on the which photographs would be best for Their local areas," she said .


"In other words, Microsoft employees in India voted on all the photos for the Indian themes; employees in Brazil voted on all the images for Brazil, and so on.


"Most of the photographs in the final themes were taken by professionals, but I also organized a worldwide employee photo contest to showcase what employees Considered most unique and beautiful about Their home countries."


There were themes produced for 20 different locales of Windows 7. Obviously, the content was tailored to the localized version of the operating system.


Microsoft built 20 of the 40 international themes right into copies ofWindows 7.


"A theme is selected depending on the which installed language version ofWindows 7 you buy, and where you live. So, if you buy the French version of Windows 7 and you select "France" as your location, you'll see a French theme in your Personalization control panel, "Shepherd Revealed.


Only Windows 7 copies sold in Australia, Brazil, Canada, China, France, Germany, India, Italy, Japan, Korea, Mexico, the Netherlands, Poland, Russia, South Africa, Spain, Taiwan, Turkey, the United Kingdom, and the United States come default with geographically-relevant themes featuring wallpapers.


Another 20 theme packs were uploaded to the Windows Personalization Gallery and made available for download free of charge.


Our goal in preinstalling themes for selected locations was to the makeWindows 7 feel like it was made for you from the moment you begin to use it-no matter where you live in the world. We wanted to the make sure there was a wide variety of themes available on the gallery, too-and we've been adding to it ever since, "Shepherd explained.


At the same time, there have been additional themes created with content from Various markets worldwide the which ended up on the WindowsPersonalization Gallery.


These themes were put together by local artists or photographers and are Scattered across the gallery.
Password : www.dytoshare.us
Download 60 Over Theme Collection For Windows 7

Terima kasih selamat mencoba
Sumber : softwaregratis